Product Focus: aD5 Instrument Editing
- Jan 16, 2023
- 3 min read
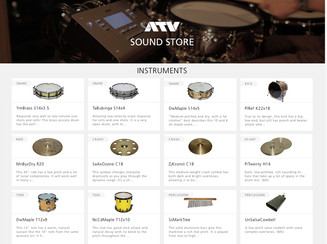
The aD5's high-resolution sound reproduces the authentic timbres and dynamic range of drums, cymbals, and percussion instruments. In addition, the ATV Sound Store's collection of aD5 instruments enables the module to be expanded.


A lesser-known feature of the aD5 is its powerful instrument editing capability, which can be used to create custom instruments from the installed 'Tones'.
Each aD5 instrument is built from tones (sounds) assigned to trigger zones. For example, a typical snare instrument has three trigger zones (A, B, C) and three tones.
[INST] Snare - Head Zone (A): Head Tone - Rim, Zone (B): Rim Tone - Cross Stick Zone (C): XStick Tone
When an aD5 instrument is installed on the module, its composite tones become available to select and assign to zones. The aD5 also enables the user to 'clone' (copy) an existing instrument, so it can be renamed and its tone structure edited to make a new instrument.
This article breaks down the instrument editing process step-by-step. The following video also shows the instrument editing process being applied to create a custom crash:
Create a Custom aD5 Instrument using Tones
This process focuses on the example of cloning and editing a snare drum instrument.
On the HOME screen, strike a pad that corresponds to the type of instrument you want to create (snare, tom, crash, etc.).

Press the MENU button followed by the INST button to access the instrument submenu.

Press the MANAGE INST button to access the list of installed instruments.

The MANAGE INST screen is displayed.
Use the value knob to scroll through the available instruments in the GROUP (SNARE).
Select an instrument you want to copy and edit.
Press the = button to bring up a submenu of instrument management options (NEW, CLONE, DELETE).
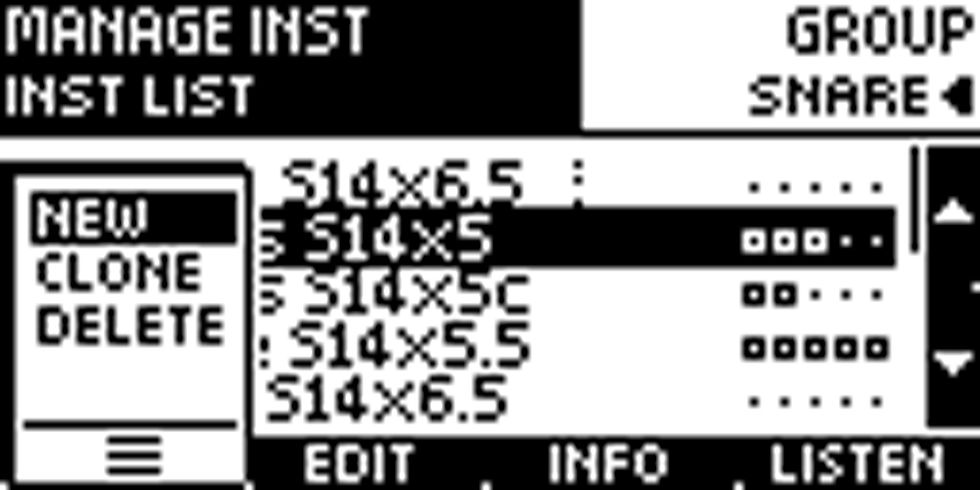
Use the value knob to select CLONE and press the OK button. (Note: NEW can also be selected, but copying an existing instrument using the CLONE function is a quicker way to get started with creating custom instruments).

The CLONE INST NAME screen will display.
Edit the instrument name to be unique (INST NAME). Press OK to save and exit the screen.
You will then be prompted to confirm the action to clone the instrument.
Press OK to clone (copy) the instrument with a new name. This process will take a few moments to complete.
When the process is completed you will be returned to the MANAGE INST screen.
Press the EDIT button to edit the new instrument you just created.
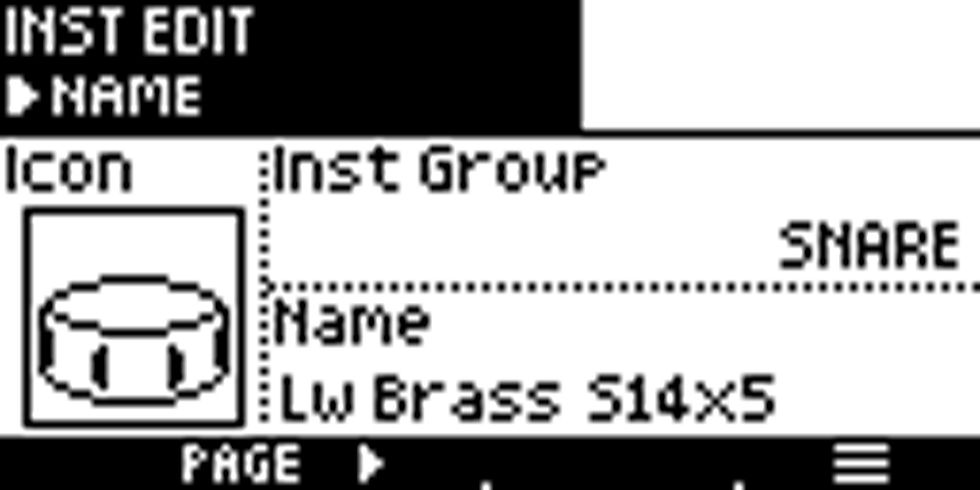
The INST EDIT > NAME screen will display.
Press the PAGE > button once to access the INST EDIT > TONE ASSIGN screen.

In the INST EDIT > TONE ASSIGN screen, tones are selected and assigned to the instrument's trigger zones.
To select a ZONE, use the button adjacent to the top right of the screen, or simply strike the pad's trigger zone.
The currently selected instrument GROUP indicates the number of installed tones.
The image above shows that 36 tones are installed in the snare group, and the tone 'Lw Brass S 14x5 Head' is currently assigned to zone A.
To change the tone assigned to the zone, turn the value knob to scroll through the selection of available tones in the active group.
Use the LISTEN button to audition different tones quickly.
The 'Level' setting can be adjusted independently for each zone.
When you have finished selecting and assigning tones to the instrument's zones, press OK to save the instrument.
Next Steps
Success! You have now created a custom aD5 instrument.
Using the aD5's instrument editing features it is easy to add new dimensions to your kit sounds by creating variations on existing instruments. Here are some more ideas to try out:
Create a hybrid ride cymbal with a china crash tone assigned to the edge (zone B) and a percussion tone assigned to the cup/bell (zone C).
Clone a snare drum instrument and change the tone assignments for the rim shot (zone B) and cross stick (zone C).
Connect a tom pad to either AUX 1 or AUX 2. These inputs support two-zone triggering (A, B). Create a tom instrument with a tom head tone for the head (zone A), and a percussion tone for the rim (zone B).
After creating your own custom instruments, the next step is to combine them to make a kit. The aD5's instrument editing and kit creation functions can be used to make a variety of powerful, expressive instruments and unique-sounding kits.
Links
aD5 Product Page: Find out more about the aD5 module
ATV Sound Store: Create an account and register your aD5 module. The sound store has a collection of free and paid aD5 instruments for download.
If you have a question about the aD5, please get in touch using the form on our Contact Us page. Our Dealers page has links to stores where you can purchase the aD5.


Comments